Windows: Extracting a "Zipped" File
Extracting (or "unzipping") a ZIP file in Windows (XP, 7, and 8) is really, really easy to do.
Unless, of course, you don't know how to do it.
But that's a problem that's easily remedied, too!
If you don't unzip the files first, for instance, you will likely not be able to save any work or changes you make in them!
Why "Zip" a File, Anyway?
Well, for one thing, zipping (or compressing) a file makes it smaller in size. This means that downloading the file will be faster and require less bandwidth.
Additionally, if you want to take a group of files or folders and "combine" them into one bigger file — say, for easy transfer via email — then "zipping" the files is what you need to do. It's an easy way to package a group of files into a single, more-portable format.
So here's how to unzip (or "extract," or "decompress," a ZIP file in Windows XP:
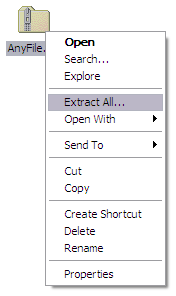
Locate the ZIP file you need to extract. If you're like me, you download most files right to your desktop. In any case, though, you're looking for a file icon like this:

The file name will be different, of course. The important thing is the ".zip" extension.
Now right-click the ZIP file. In the drop-down menu which appears, select EXTRACT ALL. Like so:

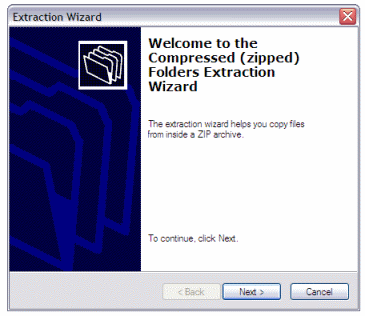
A new window appears:

Windows will now walk you through the extraction process. Click the NEXT button to continue.
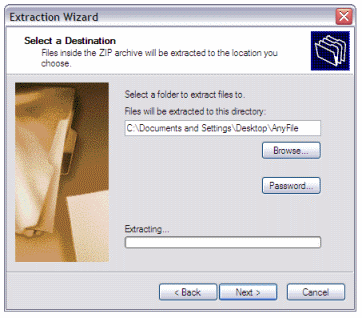
In the next window, you'll tell Windows where you want the file to "extract" to. In other words, Windows is asking, "Where do you want the 'unzipped' file to end up?"

I like to extract files like this to my Windows desktop, or else to a folder named "Temporary" on my hard drive. But that's just me.
You want to be able to find it and use it, right?
Once you've selected the destination for your extracted file — either by browsing to it or by typing in the directory — then click the NEXT button.
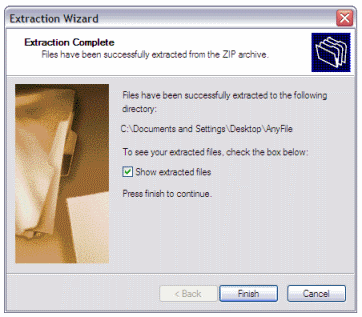
The third and final window of the Extraction Wizard looks like so:

If you want Windows to open the extracted folder and show you the files inside, checkmark the "Show extracted files" option. Then click the FINISH button. Once you do that, your file should now be extracted ... or unzipped ... or decompressed ... or whatever you wish to call it.
If you told Windows to extract the file to the same place that the (original) zipped folder resides, then you should now see two files there:

Any files inside that second, unzipped folder are now ready to use.
See? Not difficult at all! 