Every so often I find the need to swap (or transpose) rows and columns in Excel.
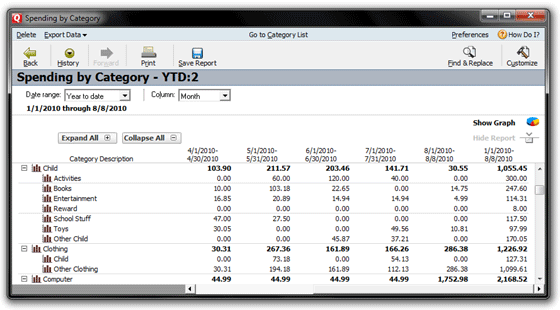
Take a report generated in Quicken, for instance. I like to see how my spending categories change from month to month. Getting Quicken to generate a Spending Report that shows this is really easy. In the Quicken menubar, REPORTS → SPENDING → SPENDING BY CATEGORY will get you there. Generate the report, then select your Date Range. Add a column for “Month” and you’re set:
Exporting this data to Excel is a simple matter, too. In the Quicken report menubar, choose EXPORT DATA → REPORT TO EXCEL-COMPATIBLE FORMAT, then give your data a save location and a name, and save it.
One problem, though: When opened in Excel, Quicken reports usually have the date periods as columns, and spending categories reside in rows. What if you want your categories in columns, and your dates in rows? (This is usually my preference.)
Thankfully, Excel makes such a switch very easy to do.
Transposing Rows & Columns in Excel
As an example, I created a “Spending by Category” report in Quicken which shows my auto expenses for a portion of 2010 (March 1 thru July 31):
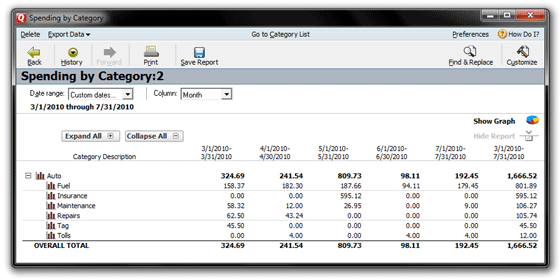
Exporting that to an Excel-compatible format gives me a text file, which I named “Data2.txt” and saved on my desktop. I then opened a blank Excel spreadsheet, and from within Excel, I then opened Data2.txt.
Importing a text file to Excel like this is quite easy: In the Excel menubar, select FILE → OPEN. Navigate to the text file you wish Excel to import. Excel opens its Import Wizard, where you can change column breaks and ignore rows as necessary. When you’ve finished this, click OK to close the Import Wizard, and your text file should now be converted into Excel.
Readers who wish to follow along with the files I’m using can get them here:
Excel File: Sample Data (ZIP file with Data2.txt and Data2.xls inside)
Just download and extract that ZIP file, and you’ll have the files I use below. Play with them as you wish!
Once the text file has been opened in Excel (I’m using Excel 2010), it’s time to work some magic. We want our date headers to be in rows, rather than columns, and our categories to be in columns, rather than rows.
First, select the area of data to be transposed. In this case, that’s B5 thru H13:

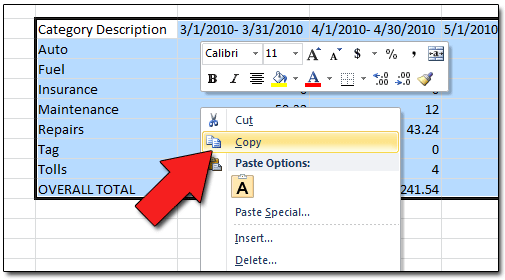
Now right-click inside that area, and select COPY:
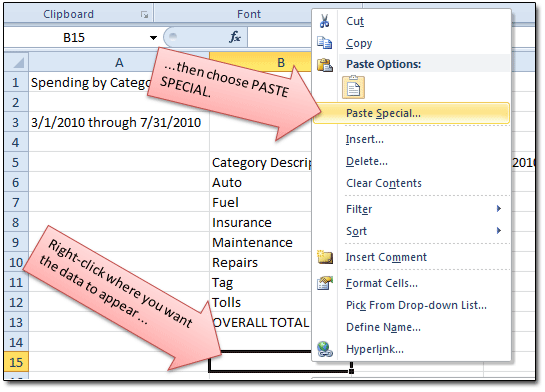
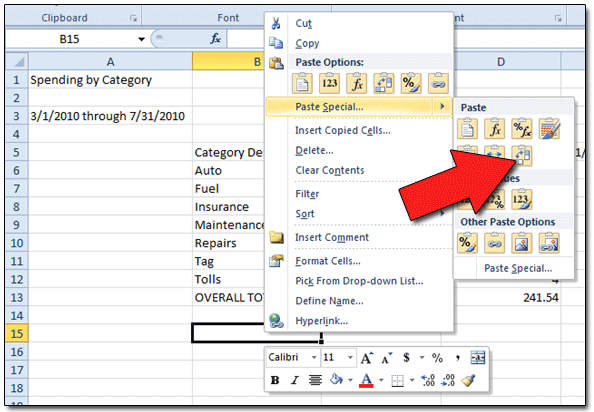
Now place your cursor in the spot where you want the data to be moved (and transposed) into. For this example, I’ll select Cell B15. In that cell, right-click again, and choose PASTE SPECIAL:
In the PASTE SPECIAL menu that appears, select TRANSPOSE:
Our data rows and columns have now been switched (transposed)!

I can’t tell you how many times that this feature of Excel — being able to swap rows and columns with a few clicks — has saved me TONS of work!


Robert Wilson wrote:
thanks for the post
Jerri Fort wrote:
Thank you! This worked perfectly!