It was something I’ve wanted to do for a long, long time … but never really had the guts to attempt.
Until several weeks ago.
After perusing Dell’s website for a while, and being not at all impressed with the price/performance ratios I saw, I determined that I was going to build my own computer. For the first time. At age forty.
It’s now done. The computer works, even. And because of that, the build was actually quite fun. Here’s my wrapup, for those interested. (Hey, it’s related to personal finance, because if nothing else, I saved some money!)
Our History with PCs
Lisa and I have owned quite a few PCs over the years, starting with Acers and Compaqs (both were crap) many moons ago. Our latest desktop PC was a Dell, as was the one prior to that.
We bought the current Dell Dimension desktop back in 2003; it’s been a solid and durable machine over the years, requiring only modest upgrades here and there. (I think I added a 256mb Nvidia video card at one time, plus a second hard drive. And maybe some RAM as well.)
These days it languishes in our home’s “computer room.” Due to its age, the Dell is little more than a dust-collecting hub of sorts for our printer, wireless router, and our several household laptops … and it’s an occasional gateway to the interwebs for our daughter. (When she’s not able to get on a laptop because Mommy and Daddy are using them, that is.)
Time for a New Computer: Our Goals
Lisa and I aren’t diehard “gamerz,” but when we find games we like, we’ll play the crap out of ’em. Such is the case with current offerings like Elder Scrolls V: Skyrim, Civilization V
, and the various Sims concoctions. (Not to mention the upcoming Diablo III
, assuming it ever actually hits the shelves.)
In recent years, what games our family has played have been on our PS3 and Wii. This is fine … to a point. The PS3 is nice, but it has always been our opinion that, while game consoles have their merits, the more involved games (i.e., not button-mashers) are best played on PC. Mods and cheats … yay!
(In our pre-kid years, Lisa and I had great fun staying up ’til 3 or 4am playing the Civilization series, and darker stuff like Nocturne, on our desktop.)
Obviously, a 2003 Dell Dimension with a Pentium 4 and a 256mb video card isn’t gonna play Skyrim at any sort of acceptable level. Nor will it run Civ V. Nor will any of our laptops. (Well, our laptops will play Civ V okay, but that’s about as far as they’ll go.)
And given the fact that our Dell is now making all kinds of noise while it’s running (pretty much 24/7), is useless for the sort of gaming we really want to be able to do, and is long past the end of its upgrade cycle, we decided that a new computer was in the cards.
Now, the choice: Buy prebuilt, or build our own?
Comparing, Contrasting, Considering
Remember how I mentioned that I’d always kind of wanted to build my own computer, using components selected by me? Well, that’s absolutely true. But even this time, my first inclination was to shop Dell, since we’d had such good luck with their desktops in the past.
But the more I perused Dell’s site, the more I understood that I was going to be spending around $1,400 to get a computer that would do what I wanted, gaming-wise. That seemed a bit stout. Add onto that the fact that that computer would come preloaded with lots of Dell crapware that I didn’t want, and you have the foundations for my going the self-built route.
1) I want a computer that’s built from decent components. I want to know what’s “in the box.” I want to know that the PC maker didn’t give me a nice video card, but cut corners with a cheapo motherboard or power supply.
2) Improved price/performance. Sure, I could find a Dell PC that games all night. But to get one comparable to what I built myself (for $1,100) would’ve cost me at least $1,400 from Dell. And even then, it would be “dirty.” That’s explained next.
3) I don’t want a PC that’s preloaded with gigs of crapware. Experience has taught me that OEM bloatware is a royal PITA to remove. Frankly, I’m tired of dealing with it, and I’m damn sure tired of paying for it. Figuring out what can go, and what can’t, is a gargantuan task in itself, and often fraught with compu-peril. (Of course, you can always just reformat the hard drive on Day One, installing a clean MS Windows, Linux, or whatever. That’s what I’ve done with a couple of laptops. But hunting down the correct drivers wasn’t much fun.)
4) Upgradeability. If you choose the components, you’ll know what they can handle going forward. If you build the system, you’ll know what’s involved as upgrades become necessary (new hardware, drivers, etc.). This, to me, is a big plus.
5) Nom nom nom: Brain food. Building a computer is fun — when everything works, of course. Plus it’s just a good hands-on learning experience. For me, there’s a certain measure of pride in building something that doesn’t just look nice, but is also productive and useful in some way. Certainly that can apply to “computer building” just as it does to other things I enjoy (woodworking, software, and so on).
Research … And Choices Made
So those were my reasons. As I’d never built a PC before, it was a certainty that lots of research was going to have to take place. Hours of message-board reading at sites like Tom’s Hardware was a given, but I also wanted to grab a book of some sort on the topic. For this, I chose Building the Perfect PC, and read it front-to-back a couple of times on my Kindle app.
I found Building the Perfect PC to be extremely informative, and — perhaps more importantly — quite reassuring for a newbie builder. Among other things, it gave me some idea of “good reputation” PC-component manufacturers. And if nothing else, having such a book in my Kindle archives pretty much certifies my 100% Geekitude.
For those folks interested in such things, I’ll list out the components I chose, along with a brief bit of reasoning on each:
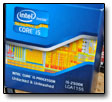
CPU: Intel Core i5 2500K ($220 @ Amazon)
As of the time of this post, the Intel i5 2500K is an overwhelming choice of gaming-PC builders. Its stability when overclocked (maybe something I’d consider later) is unsurpassed. The fact that it’s not Intel’s current Top of the Line CPU means it costs ~$100 less than an i7 … but with no real performance drop-off for the things I’ll be doing.
Video Card: Sapphire Radeon HD 6970 2gb ($340 @ Amazon)
Contemporary video cards are rather pricey, and because we wanted one that would last us for a while, the video card was always going to be the single most expensive component of the build. With lots of great reviews, the HD 6970 seemed to be a very strong graphics card. Again, it’s not top-of-the-line, but certainly strong enough to keep us in HD gaming bliss for years to come.
Motherboard: ASUS P8Z68-V/GEN3 ($185 @ Amazon)
Calls to a couple of professional PC builders (friends of friends) suggested to me that ASUS was one of the two or three premier mobo manufacturers today. From there, it was just a matter of finding an ASUS mobo with the correct size factor (ATX), processor setup (LGA 1155, matching Intel Core i3 / i5 / i7), and features to do the job I wanted. This one fit the bill nicely.
RAM: Corsair 8gb (2x4gb) PC3-12800 1600mHz DDR3 ($49 @ Amazon)
RAM seems pretty darn cheap these days, and 8gb should be quite enough to keep Windows 7 Pro, plus any games, running smoothly for a long time.
Power Supply: Corsair 550-Watt Modular Power Supply ($98 @ Amazon)
The Corsair brand of power supplies came highly recommended, over and over again, on the PC-builder forums I read. If I ever wanted to add a second video card, I’d have to go to a larger power supply. But for now, 550 watts should do the trick. (I also read that power supplies are often the first component that mainline PC makers like Dell, HP, and so on will skimp on to keep prices down.)
Hard Drive: Seagate 7200rpm 500gb SATA Hard Drive ($85 @ Amazon)
Meh, it’s a hard drive, and you gotta have one. Seagate has been good to me over the years, so I went with them. As of right now, hard-drive prices are quite dear, thanks to flooding in Thailand which decimated all the HD manufacturers’ factories. Prices which would’ve gotten me a 1TB hard drive (or larger) last year are getting me only a 500gb version now. Bah.
But, when prices come back down, this can always be upgraded pretty easily. And I’m open to adding a solid-state drive later, as well, for just the operating system and related files.
DVD Drive: Lite-On 24X DVD+/-RW Dual-Layer Drive ($25 @ Amazon)
Meh, it’s a DVD drive. These things are expendable. You’ll pay more for dinner out at a decent BBQ joint.
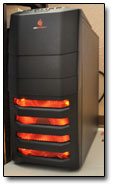
Case: Cooler Master Storm Enforcer Mid Tower ATX Case ($89 @ Amazon)
Lots of great reviews on Amazon helped this case catch my eye. I wanted a full-sized case, since space isn’t really an issue for us at the moment. Plus, it needed to be compatible with ATX-form motherboards like the ASUS one I chose above. The newbie-friendliness (spacious, good wiring management, durability) of the Enforcer was also a plus.
Operating System: Windows 7 Professional
I had a new and unopened copy of Windows 7 Pro from a previous laptop cleanup that never materialized. Already having this OS disc ready to go meant I would save at least $100 on this build. (To save money, one could always go the open-source Linux route, too. But that was never really an option for me.)
Peripherals
We already had an unused wireless keyboard/mouse setup in our stash, as well as a set of PC speakers. Had I wished to do so, I could’ve used the LCD monitor attached to our Dell. I went ahead and upgraded both the speakers and the monitor once the new computer was built and functioning, but those items weren’t integral to the build.
The Final Price Tag
And those are the components I chose. For the wallet-watchers keeping track, the tally goes like this:
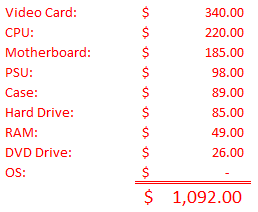
If a Windows 7 operating system disc had been needed, I’d have added another $100 (at least) to that total.
Putting It All Together
There are skads of YouTube videos showing how to build a desktop PC, step by step. And I watched a lot of them.
All in all, the build went very smoothly. I’d estimate that it took a Very Nervous Me about half of a Saturday to piece everything together, creeping toward that “Okay, time to press the power button!” moment. I did lots of precautionary static-discharging, as well as lots of double- and triple-checking of my cables and connections.
The rest of my build day was taken up with installing the OS, updating drivers, getting acquainted with BIOS options, and loading some basic software (virus protection, Adobe Reader, Flash, etc.) on the machine. And let me tell you: Heaven is firing up your brand new, self-built PC, and finding a Windows desktop with nothing on it other than Recycle Bin. Glory, glory, hallelujah, and so on.
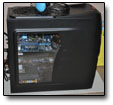
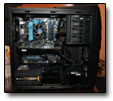
The ASUS motherboard fit perfectly in the Cooler Master case; I didn’t have to flex or bend the board a bit for it to line up with the mounting screw-holes. I did have to remove one of the two drive cages in order for the Radeon video card to fit, as it’s pretty darn large. No biggie, though, as I’m not interested in throwing an additional five or six drives (DVD, hard disc, or otherwise) into this machine.
I am extremely happy with the Cooler Master case. It is sturdy as heck, and looks great. Front USB and audio jacks are at the top of the case, so they’re super-convenient to access. (Contrast this to our current Dell, where the front USB ports are at the bottom, angled down, and covered by a door that obscures them from view, even when open. You can’t see which way to plug in a USB device unless you’re laying on the floor, OR unless you keep the PC on your desk, at eye level. Nice design, huh?)
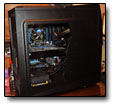
Internally, the Cooler Master’s nooks/crannies for running SATA and all the other cables are plentiful. Air flow (via the case’s two fans) seems great. The DVD and hard drives were ridiculously easy to install.

Summary
Pretty much as I’d figured, building a computer was fun. This stands to reason, as I am, obviously, a total geek.
The computer’s been running and gaming for a couple of weeks now. I still get giddy whenever it fires up and I have that spotless, crapware-free Windows desktop shining up at me. (Please — no comments about how Windows itself is crapware. Its drawbacks, certainly, are many.)
Yes, I had a blast putting together a machine that actually works and does something. Sure, this one’s mostly for gaming and ‘net surfing. But if you’re a guy like me, who remembers so vividly that glorious moment in 1980 when you first placed your fourth-grade hands on a computer (a Radio Shack TRS-80, in my case) and watched, astounded, as its green screen responded, text-adventure-style, to your typed commands … well, the fact that you JUST BUILT ONE OF THOSE THINGS AND IT ACTUALLY FREAKIN’ WORKS is a mighty, mighty achievement indeed.
How far things have come. How wonderfully, amazingly far.


Mun wrote:
I’ve been looking for a new laptop/desktop for some time because my current laptop is aging – and I agree, many computers in the market don’t have a great price/performance ratio.
But I’ve never thought about building my own computer until I read this post. Not sure if I’ll be able to do that, (no tech background whatsoever!) but it does sound exciting. Assuming that the machine will work, of course 🙂
Michael wrote:
I should’ve started building my own computers years ago, honestly. There was absolutely nothing complicated about it.
Eric wrote:
Congrats on the build. It really is easy, isn’t it? I’ve been building since the early 90s. I tell people that really it’s not much more complicated than Legos. Just a bunch of parts that pop into slots or hook together with cables. The most work goes into researching the components and deciding what to put into the box. Wow I didn’t know that HD prices had gone up that much. I got a 1TB 7200rpm drive about six months ago. You didn’t mention what you did for a CPU cooler. Aftermarket or the one that came with the proc? That will be an issue with overclocking, but OC’ing seems pointless these days with CPUs being so unbelievably powerful right out of the box.
Michael wrote:
Oh, I used the stock Intel cooler, since I’m not overclocking any time soon. If I decide to do so later, then yeah, an upgrade of the CPU cooling fan will have to take place.
The Legos analogy is dead-on. It’s a lot like that. Although I don’t remember any Lego sets that utilized SATA cables or cooling fans. 🙂
The most work goes into researching the components and deciding what to put into the box.
Yup. Absolutely.